Bill Pay Embed Changes Coming
-
We want to keep you informed
NISC has announced plans to retire the Bill Pay Embedded Login feature used by many of our members. This decision comes due to ongoing challenges with Chrome compatibility, cookie security, and maintaining a secure embedded login experience.
-
Don't worry, we've got you covered
NISC recommends transitioning your website to use a simple link to Smarthub instead. This ensures a smooth and secure bill pay experience for your members.
-
Looking ahead
NISC is actively exploring additional options for the future. Stay tuned for further updates on alternative solutions.
-
Time to update
If you currently use the embedded login, get ready to switch gears. Consider incorporating a clear link, banner, or button on your website that conveniently directs members to their Smarthub bill pay account.
Let's walk through some easy-to-implement elegant solutions.
Replace the content in the bill pay embed area with simple text, links, and icon pairings.
A great example can be seen on Bartlett Electric Cooperative's website.
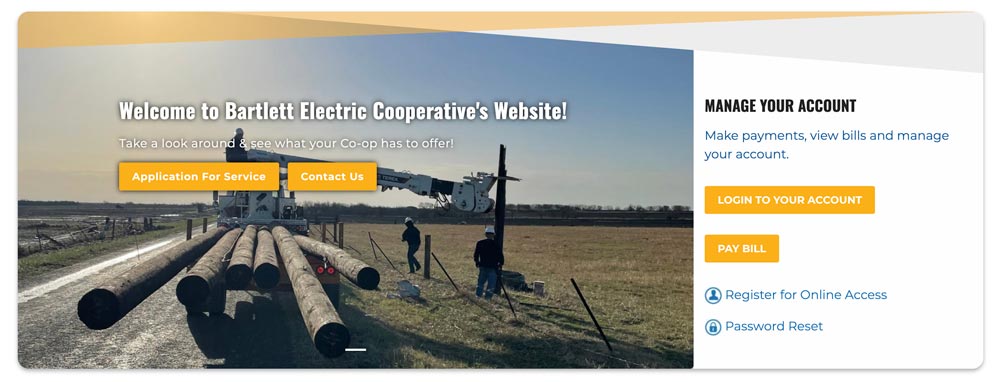
To recreate this same setup, follow the instructions below...
Before we get started, you will want to download two of the icons below. Feel free to choose either the blue or dark grey versions, you only need one set to get started. Upload these two images to the /icons folder in your File Manager.
![]()
![]()
![]()
![]()
Additional Image Link Options
We located a collection of SmartHub related images that will work nicely for buttons on any website.
Feel free to right click and save these assets to your computer.
You can link any of these images to your SmartHub portal, and use them in-place of an embed.
1) Navigate to your "Custom Block Library" (/admin/structure/block/block-content) and click "+ Add Custom Block" (/block/add).

2) Choose the "Basic block" type.
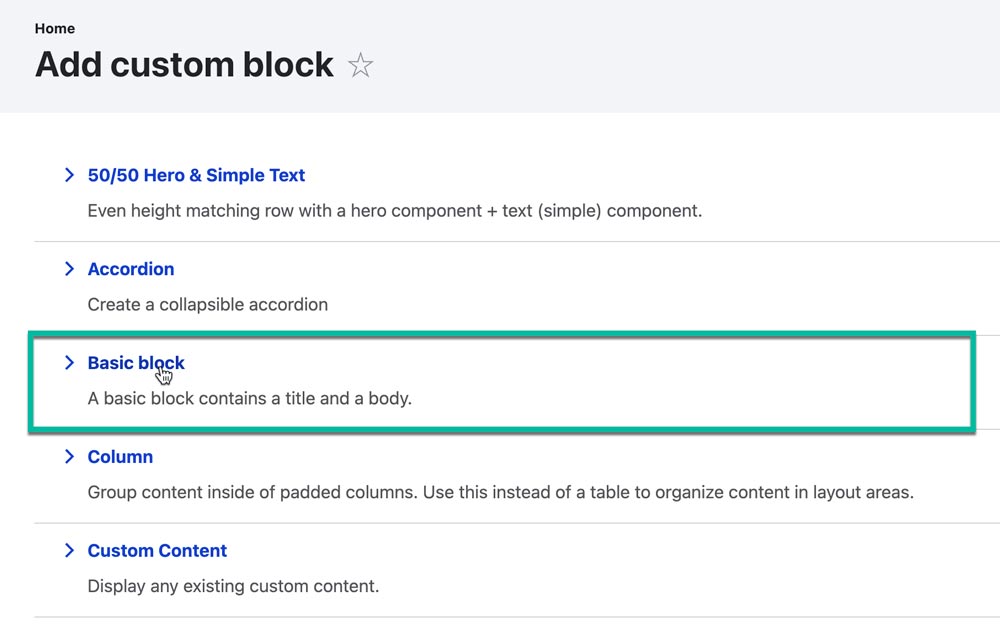
3) Highlight, right-click and choose "copy" for all the code below. We will use this for the next step.
<p><span style="color:#005a9c;">Make payments, view bills and manage your account.</span></p>
<p><a class="button" href="https://yourcoop.smarthub.coop/Login.html#">LOGIN TO YOUR ACCOUNT</a><br />
<p><a href="https://yourcoop.smarthub.coop/Login.html#registration:"><img alt="icon_user.jpg" height="32" src="/sites/default/files/icons/icons8-user-blue-64.png" width="32" /> Register for Online Access</a></p>
<p><a href="https://yourcoop.smarthub.coop/Login.html#forgotPassword:"><img alt="icon_lock.jpg" height="32" src="/sites/default/files/icons/icons8-password-blue-64.png" width="32" /> Password Reset</a></p>
4) Type in the "Block description", something like Manage Your Account. Now click the "Source" button and CTRL+V or paste in the code above directly into the "Body".
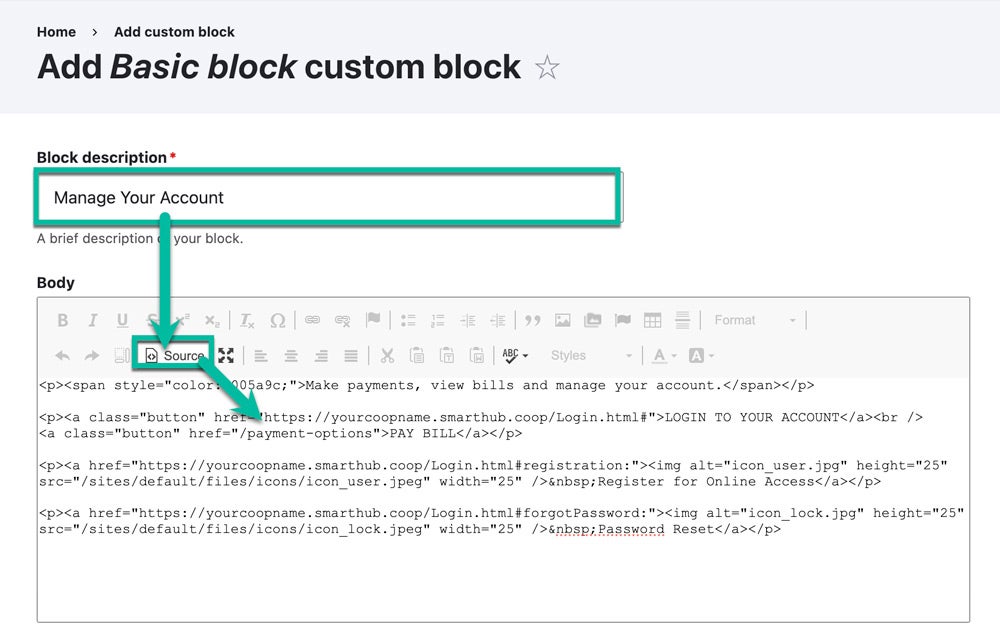
5) Change the 3 instances of yourcoop to your SmartHub address. Do this for login, register, and reset password. If you have V2 of SmartHub, the URLs might be slightly different than above, and you may have to replace the full addresses.
Note: If you prefer, you can right click the icon images, and change them to different icons.
When you are done, click the blue "Save" button to create your new bill pay block.

6) Navigate to "Structure" -> "Block Layout", so we can place the block in our homepage layout next.
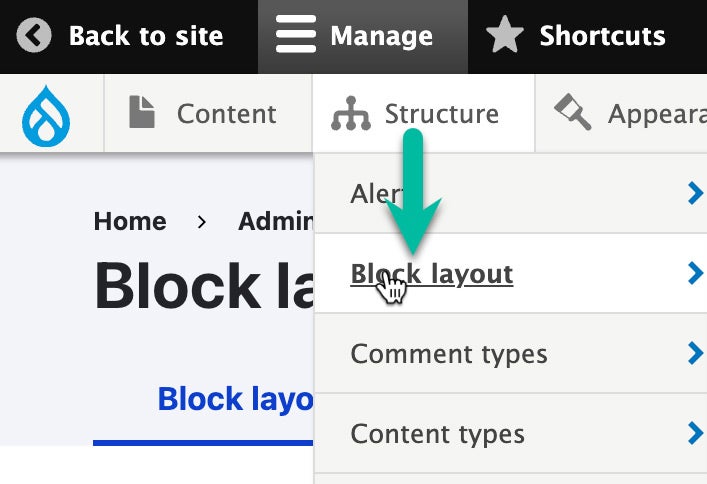
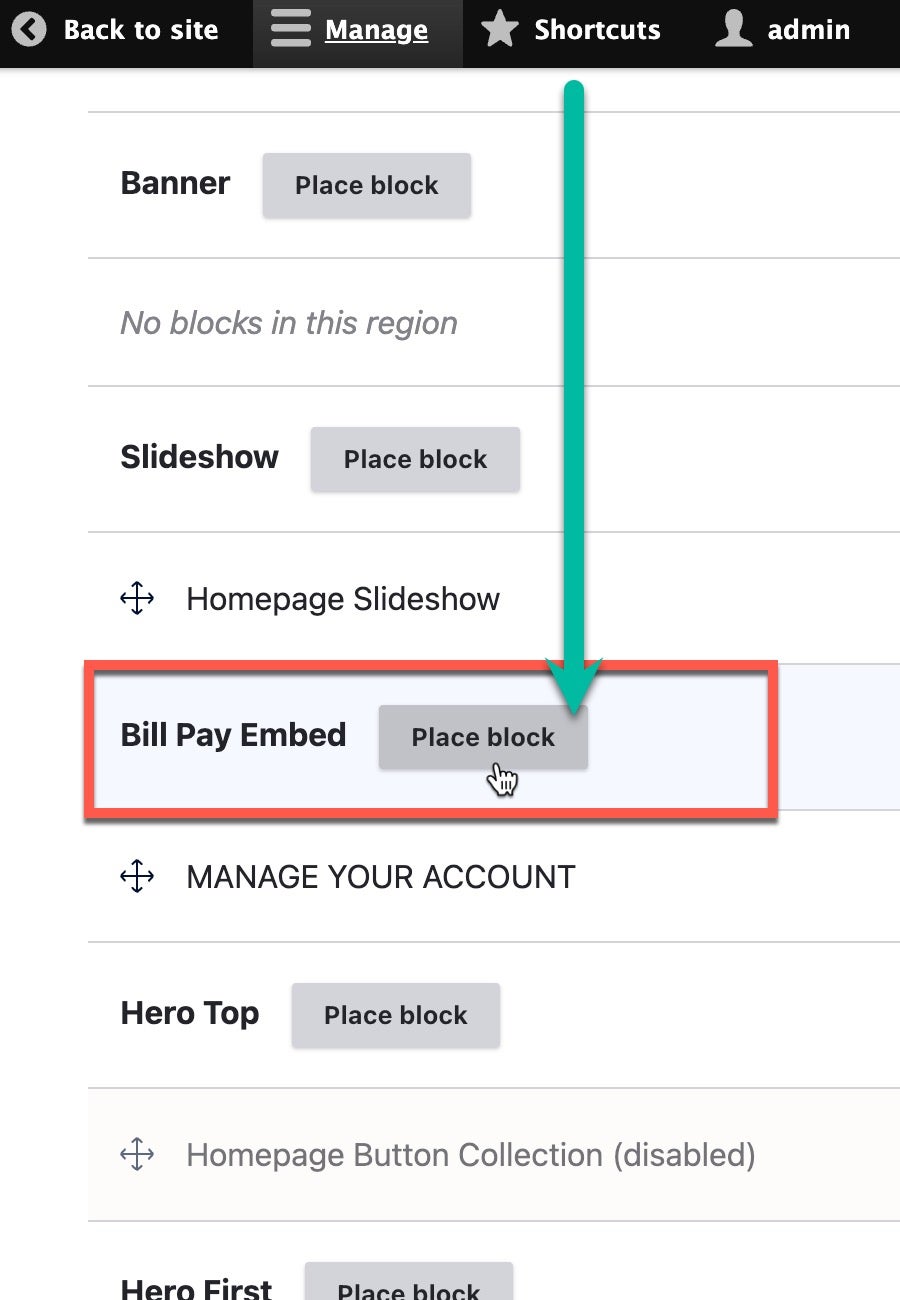
7) Scroll down to the Bill Pay Embed region, and click Place Block.
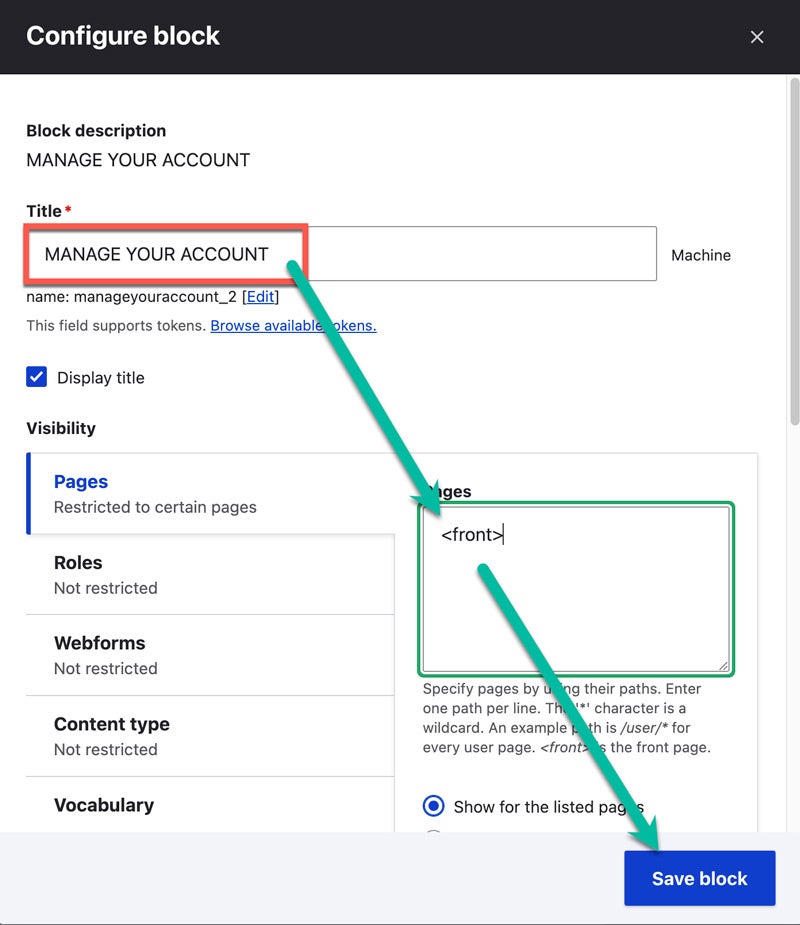
8) Change the Title if desired and in the Visibility section type <front> into the Pages field. This will ensure the block displays only on the homepage of your website and not on every page, so it's an important step.
9) Congratulations! You have now enabled your members to easily find bill pay services on your website.
Read more articles
- Log in to post comments
